Build และ deploy docker container ด้วย terraform
ส่วนมากเราจะเห็นการใช้งาน terraform ในการ automated cloud infrastructure แต่นอกจากจะทำงานกับ cloud service provider ได้ดีแล้ว terraform ยังสามารถใช้ในการ build และ deploy docker container ได้อีกด้วย

การใช้งาน terraform docker บน Windows
เนื่องจาก terraform cli ต้องคุยกับ docker daemon ซึ่งการที่เราใช้งาน docker desktop for windows นั้นมีวิธีการติดตั้งทั้งแบบ HyperV และ Windows Sub Linux (WSL) version 2 ดังนั้นตอนติดตั้ง docker for desktop เราต้องแน่ใจว่าเราติดตั้งลงบน WSL2
และเพื่อที่จะให้ terraform สามารถคุยกับ docker daemon ได้เราต้องเปิด settings ใน docker for desktop และเปิด Expose daemon on tcp://localhost:2375 without TLS ซึ่งหมายถึงเปิดให้ forward port 2375 ของ docker daemon ออกจาก vm ไปยังเครื่อง host (วิธีการนี้ใช้ได้แค่ใน development environment เท่านั้นเนื่องจากมีปัญหาเรื่องความปลอดภัย)
ติดตั้ง docker provider
สิ่งที่ต้องทำต่อไปคือ ติดตั้ง terraform provider เพราะ terraform ไม่ได้มีคำสั่งที่เกี่ยวของกับ docker เลยดังนั้นเราจึงต้่องใช้ terraform provider ซึ่ง provider นั้่นมีเยอะมาก สามารถเขาไปดูเอกสารการใช้งานได้ที่ terraform registry หลังจากนั้นให้ทำตามขั้นตอนต่อไปนี้
-
สร้างไฟล์ main.tf (ควรจะแยกไว้ใน folder เฉพาะ) โดยมีเนื้อหาดังนี้
terraform { required_providers { docker = { source = "kreuzwerker/docker" version = "2.23.1" } } } -
บอก terraform ว่า docker daemon อยู่ที่ไหน โดยเพิ่ม block นี้เข้าไปใน main.tf
provider "docker" {
    host = "tcp://localhost:2375"
}
แต่ถ้า docker นั้นอยู่บน Linux ให้ set host แบบนี้
provider "docker" {
    host = "unix:///var/run/docker.sock"
}
เมื่อ config provider เสร็จเรียบร้อยให้ทำการติดตั้ง provider ด้วยคำสั่ง
$ terraform init
Build docker image ด้วย terraform
หลังจากนั้นเราจะทำการ build container image ด้วยการเพื่ม resource block เข้าไป main.tf
# Pulls the image
resource "docker_image" "nginx" {
  name = "nginx:latest"
}

# Create a container
resource "docker_container" "nginx" {
  image = docker_image.nginx.image_id
  name  = "web-server"
  ports {
    internal = 80
    external = 8000
  }
}
ในตัวอย่าง code นี้ teraform จะ pull image ของ nignx ลงมาก่อน หลังจากนั้นจะตามด้วยการนำ image ตัวนั้นมาสร้างเป็น container ที่ชื่อว่า web-server และ bind port 80 ออกมาที่ port 8080 บนเครื่อง host ซึ่งจะเหมือนกับ -p 8080:80 แต่ถ้าต้องการให้ publish all ports ให้ set publish_all_ports เป็น true มันจะเหมือนกับเราใช้ -P หรือ –publish-all แบบนี้
# Create a container
resource "docker_container" "foo" {
  image = docker_image.nginx.image_id
  name  = "foo"
  publish_all_ports = true
}
หลังจากสร้าง terraform configuration เสร็จเรียบร้อยให้ลองทำการ apply โดยใช้คำสั่ง
$ terraform apply
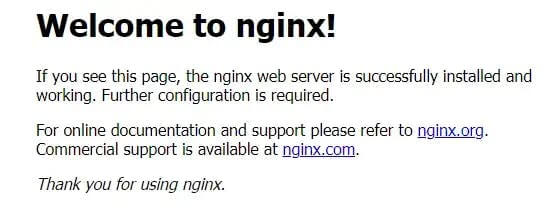
เราก็จะได้ container image ที่ build ขึ้นมาจากการเขียน code ด้วย terraform ลองเข้าไปที่ http://localhost:8080 เราจะได้หน้าแรกของ nginx


สร้าง Docker Volume
ในกรณีที่เราต้องการสร้าง volume เพื่อเก็บข้อมูล เราจะเพิ่ม resource block เข้าไปแบบนี้
resource "docker_volume" "shared_volume" {
  name = "shared_volume"
}
และให้เรา mount volume ที่ได้สร้างขึ้นนี้เข้าไปใน container ด้วยการเพิ่ม volume block เข้าไปแบบนี้
|
|
Remote Host
ในกรณีที่เราไม่สามารถที่จะ run terraform ที่เครื่องนั้นได้โดยตรง เราจะต้องใช้การ secure shell(ssh) เข้าไป ดังนั้นใน provider block จะต้อง เขียนแบบนี้
provider "docker" {
  host     = "ssh://user@remote-host:22"
  ssh_opts = ["-o", "StrictHostKeyChecking=no", "-o", "UserKnownHostsFile=/dev/null"]
}
Registry Credentials
ในองค์กรส่วนใหญ่เราจะใช้ private registry ดังนั้นเราต้องใส่ credentials สำหรับการ access เข้าไปใน container registry แบบนี้
provider "docker" {
  host = "tcp://localhost:2376"

  registry_auth {
    address  = "quay.io:8181"
    username = "someuser"
    password = "somepass"
  }
}

data "docker_registry_image" "quay" {
  name = "myorg/privateimage"
}

data "docker_registry_image" "quay" {
  name = "quay.io:8181/myorg/privateimage"
}
ถ้าใส่ username และ password เป็น plain text แบบนี้จะไม่ถูกต้องดังนั้น เราต้องเปลี่ยนให้ username และ password ไปเก็บไว้ใน Environment Variables ด้วยคำสั่งนี้
- บน MacOS จะใช้คำสั่ง
$ export DOCKER_REGISTRY_USER=xxxxxxxxx $ export DOCKER_REGISTRY_PASS=xxxxxxxxxx - บน windows เราจะใช้ powershell ในการ set ค่า Access Key และ Secret Access Key ด้วยคำสั่ง
C:\> $Env:DOCKER_REGISTRY_PASS = xxxxxxxxxx
C:\> $Env:DOCKER_REGISTRY_PASS = xxxxxxxxxx
หลังจากนั้นใน registry_auth block จะเหลือแค่นี้
registry_auth {
    address  = "quay.io:8181"
}


